PO Settings
HelpID: 731922020
Begin by entering the “header” fields on the PO (PO Number, Buyer, Vendor, etc). Once the required fields are entered go to Actions >> Blanket Settings.

The PO Settings window is used to enter the Blanket Control Settings.
Close PO: see the section entitled Close PO for more information. This utility is used to force a Blanket PO to be closed. It will prompt you to confirm you are ready, and if auditing in enabled, it will also require entering a reason for closing the PO. The Close PO utility forces the PO, and all of its lines, into a Closed status.
Control PO By: the Default Control Option from Setup will determine which Control PO By option is marked. This can be changed as long as no Control Lines have been added to the PO.
The two Control Line options allow specifying a separate control amount on each Control Line.
The two PO Control options allow specifying a control amount for the entire PO.
PO Control Amount: for the two PO Control options you can enter a PO-level control (in Quantity or Dollar Amount). A quantity control will be based on the Quantity In Base for all release lines on the PO.
Release Total: displays the total for release lines in either Quantity or Cost.
Previous BPO: enter a Previous Blanket PO Number. This is used for reporting purposes and can be added to the GP Purchase Order form.
Contract Number: if you have a contract with the Vendor which governs this PO, it can be entered here and added to the GP reports.
End Date: if you have a contract with an expiration date, or you want the Blanket to only be active for a certain amount of time, enter the End Date here. The End Date is the last day on which the Blanket PO can be used. After that, no more release lines can be added.
Release Min Qty: if each release should have a minimum quantity, enter it here. If left blank (zero), there will be no minimum quantity. If a release is below the minimum, you will not be able to Commit the release.
Release Min Cost: if each release should have a minimum cost, enter it here. If left blank (zero), there will be no minimum cost. If a release is below the minimum, you will not be able to Commit the release.
Approved Items: if the Blanket only covers certain approved items, list them here. You can enter them manually, or automatically add a large number of items from a SmartList.
To import from a SmartList, open and display the SmartList you want to use. It must be a list of Item Numbers with Item Number in the first column. When the SmartList with Item Numbers is display, return to the PO Settings window and click the Add SmartList Items button.
- Red X button – deletes all items. You will be asked to confirm this action before it proceeds.
- Remove Line button – deletes a single, selected line.
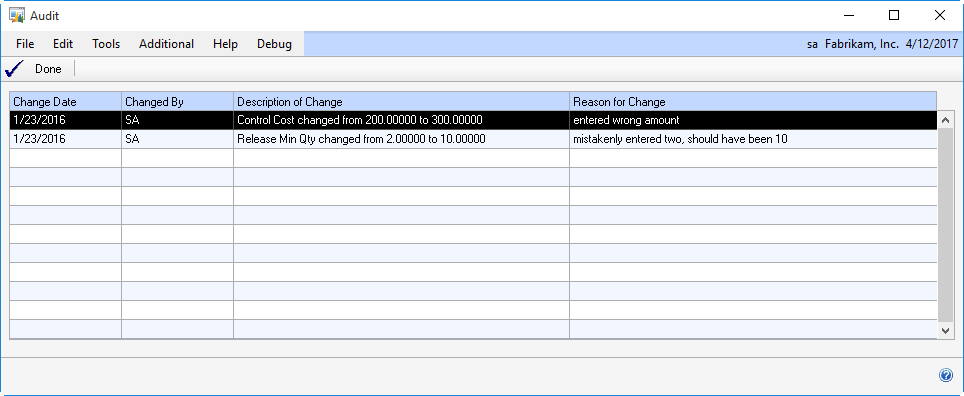
Auditing: the PO Control settings can be changed as needed, until a Control Line is added. At that point, if Auditing in enabled in Setup, any change to the PO Settings will will require entering a reason for the change, and it will be recorded with the User ID, Date and Time of the change.
The audit also records the before change value, and after change value for the field that was changed.
To view the Audit, select the GoTo button >> View Audit.
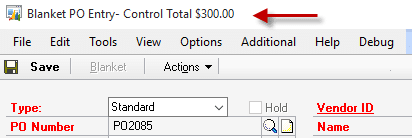
After closing the PO Settings window, the Blanket PO Entry window will show the Control Amount: