Login Monitor
HelpID: 502622095, 502622100, 502622108
Login Monitor reduces the need for additional Dynamics GP User Licenses by automatically logging-out inactive users. Inactive users can be removed from the system on an as-needed basis when a new user attempts to log-in, or they can be more aggressively removed when their inactivity reaches a pre-determined time period.
Login Monitor checks for activity, such as a long running posting process or an open transaction, before attempting to remove a user.
Login Monitor can also reserve a specific number of seats for a User Class, such as ADMIN, so that there are always logins available for those users.
Setup
Navigation: Tools >> Setup >> Company >> Setup GP PowerPack >> GoTo Button >> Login Monitor

If you are registered for Login Monitor, or have the GP PowerPack Suite License, Login Monitor will appear in the GP PowerPack Setup window and on the GoTo menu. The settings for Login Monitor are global and apply to all company databases.
Changes to Login Monitor options do not take effect until you restart the GP client. Users already logged-in to GP will not be affected until they close GP and log-in again.
Remove Users: Options include:
- During Log-in
- When Expired
- Disable Login Monitor – By default, Login Monitor is disabled
During Log-In
this control method only logs-out users when (1) a new user attempts to log-in, (2) the user count is at a maximum, and (3) there are inactive users who have exceeded the Allowed Inactivity period.
This method allows user to remain in the system indefinitely if the total user count is below the maximum allowed. Use this setting to make maximum use of your user licenses, while allowing as many users as possible to be in the system.
When a user logs-in and the system is at the maximum allowed user count, the Login screen (below) will show that the Current Users equals the Users Allowed.

If there are inactive users Login Monitor will remove them and you will be allowed to log-in. All inactive users will be removed at this point.
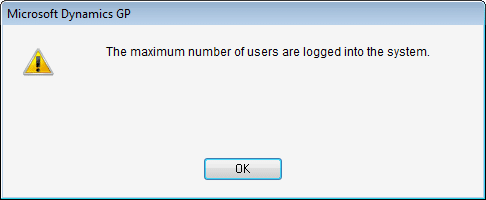
If there are NO inactive users you will receive the normal user maximum users warning shown below:
When Expired
This control method logs-out users after they have exceeded the Allowed Inactivity period. Use this setting if security is a concern and having idle, unattended GP clients provides an opportunity for unauthorized access to data.
The user’s GP client will check every minute to see if the user has been inactive for a time period greater than the Allowed Inactivity. If so, Login Monitor will remove the user’s log-in from the system. It will also automatically close the GP client (see Silently Close Client).
Disable Login Monitor
Turns off Login Monitor. Disabling Login Monitor immediately takes effect for all logged-in users (they do not need to restart GP). When changing to When Expired or During Log-In users will need to restart their GP client for the new setting to take effect.
Allowed Inactivity (hrs): enter the allowed inactivity specified in hours.
-
- 0.01 is rounded up to 1-minute
- 0.25 = 15 minutes
- 0.50 = 30 minutes
- 0.75 = 45 minutes
The field allows .01 of an hour (just under 1-minute). Any time entered is rounded up to a whole minute.
Polling Frequency (min): Polling Frequency determines how often Login Monitor runs to check for inactivity. It affects the two log-out methods differently.
The “When Expired” Login Monitor control method periodically checks for inactive users and removes them from the system. Polling Frequency determines how often this check is performed. Since Login Monitor runs from each GP client, in a large system there can be many clients checking for inactivity on a regular basis. If you have 20 users logged-in, each polling once per minute, the overall frequency of checking for inactivity is very high.
When setting Polling Frequency, consider how many users are typically logged-in at one time, and that they do not all log-in at the same time, so their individual timers will check for inactivity at different times.
For example, take 20 users logging-in to GP starting at 9:00AM, each 1-minute apart between 9:00 and 9:20. With a 20-minute polling frequency this would result in the combined clients checking for inactivity once every minute (each client would check once every 20-minutes, but since they logged-in 1-minute apart, inactivity gets checked every minute).
The “During Login” method logs-out inactive users when a new user attempts to log-in to GP. Login Monitor running on the inactive GP client periodically checks if it has been logged-out of the SQL Server, and if so, closes the GP client. The Polling Frequency setting determines how often the inactive client checks if it needs to close itself.
On Forced Logout Failure: See the Login Monitor History window section below for details on Force Logout Failure error codes. Most of the codes indicate that the GP client is probably busy performing some task that does not appear as “activity” within the GP client. For example, building a check batch is a process that occurs mostly on the SQL server, during which time the GP client itself appears to be inactive.
On the other hand, another error code indicates there are records in the DEX_LOCKS table. This could mean the user has Sales Transaction Entry open, which is locking a record, or it could mean there are stranded records in the table.
In either case, Login Monitor will not force the GP client to close because it cannot determine if it is safe to do so.
The “On Forced Logout Failure” setting controls how Login Monitor reacts to these conditions. There are two options in the drop-down list:
- Reset User Activity Timer: this option makes Login Monitor interpret the Forced Logout Failure as-if the user is Active, so it resets their timer. If the Allowed Inactivity is 1-hour, when their timer resets Login Monitor will not attempt to remove them for another hour.
- Repeat Removal Attempt: this option enters a “pending removal” mode where it tries again to remove the user every 15-minutes.
Silently Close Client: when marked, the GP client application will be closed when the user login is removed from the system, and the Logout Message will NOT be presented to the user. See Logout Message below.
Track Login Failures: If a user attempts to log-in but cannot do so because user count is at maximum, the failed log-in attempt will be recorded in the Login Monitor History window. Login Failures can be tracked regardless of the Remove Users setting.
-
- If Login Monitor is set to “When Inactive” and a new user logs-in and the user count is at maximum, the new user will not be able to log-in and the failure will be recorded. The user will have to wait and try again. If a user has reached their Allowed Inactivity they will be removed automatically and the user count will be reduced.
- If Login Monitor is set to “During Login” and a new user logs-in and the user count is at maximum, Login Monitor will attempt to remove inactive users. If none is active, the user count will remain at maximum, the new user will not be able to log-in and the failure will be recorded.
Track Forced Lot-outs: with either Remove Users setting, when an inactive user is removed from the system it will be recorded in Login Monitor History.
Track Log-out Failures: if Login Monitor attempts to close a user’s GP Client, but cannot do so because they have a document open, this ‘log-out failure’ will be recorded in Login Monitor History.
Logout Message: if a user has been removed from the system due to inactivity and the Silently Close Client box is NOT marked, the Logout Message will be presented. If a custom message in not entered in the Logout Message field, a default message will be used:
You have been logged-out due to inactivity.
The Logout Message is displayed in the Default Web Browser installed on the computer (for example, Internet Explorer). Displaying the Logout Message in a Web Browser allows Login Monitor to leave a message for the user while also closing GP.
An example of a custom message is shown below:

Since the message is displayed in HTML you can add formatting to the message by including HTML tags in the message. The message above was created from the text below:
Due to <font color=”red”>inactivity</font>, you have been logged-out of Dynamics GP by Login Monitor.
Before removing a user from the system, Login Monitor checks for activity that would prevent the user from being removed. See section below on Activity Checks.
Excluded Users: Change the VIEW setting to “Excluded Users”. Add users to the list who should NEVER be removed from the system.
User-Specific Inactivity Time: Changed the VIEW setting to “User-Specific Inactivity Time”. The Allowed Inactivity at the top of the Login Monitor Setup window provides a default. If a user does not have a user specific inactivity time the default value will be used. Enter a User ID and a value for the Allowed Inactivity Hrs. Login Monitor will check first for a user-specific value and use that instead of the default value.
Reserved Seats: Reserved Seats keeps a certain number of seats available for users in a User Class, such as ADMIN. It effectively reduces the total available User Count by the number of seats reserved to a User Class. For example, if you have a total of 20 concurrent users available, and have 2 reserved for the ADMIN class, there will be 18 seats left for all other users.
If, as shown above, there are 2 seats reserved for ADMIN, and a third ADMIN user attempts to login, they will consume a non-reserved user seat if one is available.
Disable Reserved Seats either by setting the number of reserved seats to zero or deleting the User Class from the scrolling window.
Reserved Seats functionality is not applied when SA or DYNSA attempt to login, so those User IDs always have access to all available seats. Since they cannot be assigned to a User Class, seats cannot be specifically reserved for them. However, you can create a “dummy” class (i.e. SYSADMIN) that reserves 1 seat to ensure there is always 1 seat available. SA or DYNSA will be able to use the one available seat.
Reserved Seats only works with “concurrent user” licensing, it does not work with “named user” licensing. It also cannot be used to reserve “limited user” licenses.
Login Monitor Inquiry
Navigation: Inquiry >> System >> Login Monitor Inquiry
View current users being tracked by Login Monitor in the Login Monitor Inquiry window.
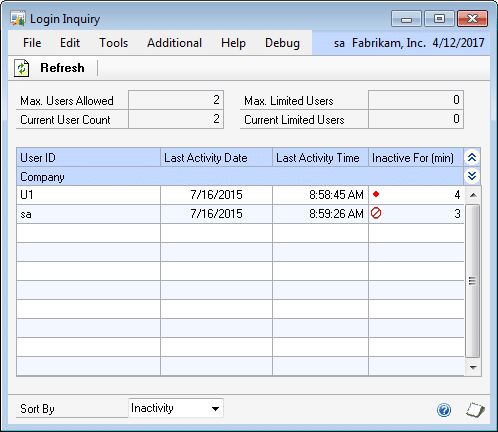
This window shows users currently logged-in to GP and how long they have been inactive.
| Icon | Meaning |
| User has been inactive for longer than is allowed, but in in the Excluded Users list, so they will not be logged-out of the system automatically. | |
| User has been inactive for longer than is allowed, and will be logged-out of the system. If Login Monitor is set to Remove Users During Log-In you may see expired users still in the system if no other user has needed to access the system. |
Login Monitor History
Navigation: Inquiry >> System >> Login Monitor History

Login Monitor can track Forced Lot-Outs, Failed Log-Ins, and Failed Log-outs (see Setup). Change the View setting to view either of these tracking reports.
CLEAR LOG will delete all records in the currently displayed view (for example, all of the Forced Log-Outs). Before deleting the records you will be asked to confirm you want to clear the selected log.
The Failed Log-Outs report shows users that should have been logged-out because they were inactive, but they could not be logged-out because they had a GP process blocking the ability to log them out safely. Lookup the Error Code in the table below.
| Error Code | Meaning |
| 1 | The Company ID does not exist. This is not a normal error code but could occur in a test environment where company databases were not restored. |
| 2 | The current user does not have access to the database containing the inactive user. This code will only occur if Login Monitor is using the “Remove Users During Login” method, and you have multiple company databases, and the inactive user is in a company database to which the logging-in user does not have access. |
| 3 | The inactive user is not in the GP Activity table. This code will only occur if the inactive user logs-out manually at exactly the same moment Login Monitor is attempting to remove them. |
| 4 | The inactive user is running system utilities. |
| 5 | The inactive user is running a financials process. |
| 6 | The inactive user is running a GL consolidation. |
| 7 | The inactive user is running a payroll process. |
| 8 | The inactive user is posting. |
| 9 | The inactive user is building a check batch. |
| 10 | The inactive user has a financials transaction window open with a transaction displayed. |
| 11 | The inactive user has record(s) in the dex_lock table (see below for more information) |
| 12 | The inactive user has a manufacturing transaction open |
| 13 | The inactive user is running checklinks/reconcile |
To track activity in GP, Login Monitor requires the user to “do something” inside GP. There are many long running processes, such as building a large check batch, which will cause the GP client to appear inactive even though processing is occurring on the server.
“Starting” a long running process appears as activity, but while the process is running the GP Client appears to be inactive. This can cause the user to appear as a Failed Log-out because when Login Monitor attempts to remove them from the system it finds a running process that blocks user removal.
Error Codes 11 and 12 indicate the user probably left GP open with a transaction displayed.
DEX_LOCK
DEX_LOCK is located in the tempdb. GP adds records to this table when a user has a transaction open in GP. For example:
- Sales Transaction Entry
- Purchase Order Entry
- Inventory Transfers and Transactions
- Cash Receipt Entry
- Payables Manual Payment Entry
- Inventory Assembly Entry
- Many more
Activity Checks
Before attempting to remove a user, Login Monitor checks the following for activity:
-
- Check posting
- Financials Posting/Report printing
- GL Period Consolidation
- Payroll processing
- Batch Posting
- Payables Select Checks building a batch
- A Financials window with a Journal Entry displayed
- File Maintenance (Check Links)
- Reconcile
- Routines
- Open Transaction windows with documents displayed. This check is based primarily on windows which use “active locking”, which creates records in the tempdb..DEX_LOCK table.
- Manufacturing window with a transaction displayed
- Field Service window with a transaction displayed