Sales Forecast Integration
Sales Forecast Integration (SFI) enables significantly better forecasting capability with the GP Manufacturing Sales Forecasting module by integrating it with Microsoft Excel. Create and maintain a forecast in Excel, then import it into GP Manufacturing’s Sales Forecast window.
Setup
Navigation: Tools >> Setup >> Manufacturing >> MFG PowerPack Setup
Mark the box next to “Sales Forecast Integration”.
Restart Dynamics GP.
Using Sales Forecasting Integration
Exporting a Forecast
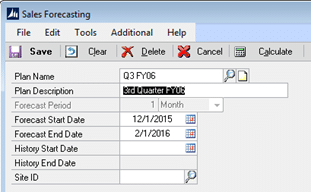
The starting point of creating a new forecast with SFI is to create a “forecast template”. Start by creating a new empty “Plan” in the Manufacturing Sales Forecasting window.
At a minimum, the Plan “header” information must be created before SFI can generate the export file. The required information is:
- Plan Name
- Forecast Period
- Forecast Start Date
- Forecast End Date
The header information is used to create the starting “forecast template”, so it must have the correct Period (i.e. forecasting by Month) and cover the correct time period (based on the Start and End Dates).

Navigation: Transactions >> Manufacturing >> Forecasting >> Sales Forecasting. Select a Plan, then select Additional >> Sales Forecasting Integration.

File Type: The default is Excel (xls or xlsx), but you can also use CSV. See notes below about using CSV files. CSV is provided for backwards compatibility and may be eliminated in a future build. Integrations should be planned around use of Microsoft Excel.
Export: Select Export to create the Forecast Template.
Current Forecast: If there is existing forecast data you want to include in the export spreadsheet, mark “Current Forecast”. If this is NOT marked, the export file will contain only the Item Numbers (if any have been added) and Periods (Dates). Only Current Forecast or Sales History can be selected, not both.
Sales History: If you have calculated Sales History and you want to include those number in the export spreadsheet, mark “Sales History”. Only Current Forecast or Sales History can be selected, not both.
Export Unit Cost & List Price: Marking this option adds two additional columns to the export: Unit Cost and List Price. The first four columns of the spreadsheet will be: Item Number, Description, Unit Cost, List Price. The Unit Cost and List Price can be updated in the spreadsheet and imported back into the Forecast. If you mark this option during the export, you must also mark the Import Unit Cost & List Price option during the import.
File: For CSV exports you must select a folder into which the CSV file will be created. Click the FOLDER icon to select a folder into which the Forecast Template CSV file will be saved. The filename will be created automatically by SFI.
Process: Click the Process button to create the Forecast Template. For Excel exports, when the export is complete, Excel will open with the Forecast Template loaded. For CSV exports, the csv file will be saved in the folder you selected.
The empty Forecast Template will look like this (if no Items have been added to the forecast and forecast data is not included):

Create the forecast by adding Items and Quantities to the template. New Items can be added to the spreadsheet, and they will automatically be added to the Plan when the spreadsheet is imported.
Do not add columns to the spreadsheet. Do not remove columns from the spreadsheet.
You can add new items and edit the forecast amounts but changing the number of columns will prevent SFI from importing the updated forecast.
Changing the dates in the spreadsheet will not have any effect on the dates in GP. When the spreadsheet is imported the system matches the spreadsheet column to the numerically matched forecast column (i.e. the 3rd date column in the spreadsheet is matched to the 3rd date column in the forecast).
Multiple copies of the template can be made, and the results merged when the files are imported.
NOTE for CSV Files
If you ADD ITEMS you should surround the Item Number with brackets: [ and ]. This will ensure that Excel treats the item number as a string. If you add an Item Description surround that also with brackets. The Item Description, if provided, will not be used in the import. If a part number has leading zeros, they will be lost if the Item Number is not placed inside brackets.

Importing a Forecast
There are two options when importing the spreadsheet:
- Append: adds the forecast values from the spreadsheet to existing forecast quantities for the item.
- Overwrite: replaces any values in the GP forecast with the values from the spreadsheet.
You might send multiple copies of the spreadsheet to different departments or region heads. To merge these, use the Overwrite option when bringing in the first spreadsheet, then use the Append option for subsequent spreadsheets.
Select the “Plan” in the Manufacturing Sales Forecasting window.
Navigation: select Additional >> Sales Forecast Integration

Import: Click the Import radio-button. Then select whether you want to Append the imported data to the existing forecast or Overwrite the existing forecast data. Overwrite deletes the forecast from the GP tables, then imports the forecast from the spreadsheet.
Import Unit Cost & List Price: if the Unit Cost & List Price were included in the export, you must mark this box to include the columns in the import. If Unit Cost & List Price are not in the spreadsheet they will be pulled from the Item Maintenance record if new Items are added to the forecast.
File: Click the FOLDER icon and select the Excel file to import.
Process: Click the Process button to import the forecast. When the import is done, the Sales Forecast window will refresh.
If the spreadsheet contains an invalid Item Number, it will be skipped, but it will be noted in the spreadsheet. Invalid Item Numbers will be indicated with “<< Invalid Item” in the Item Description column.
Quantities are rounded, if needed, to the Item’s Decimal Place Quantity. If the Item has zero Quantity Decimals, but has 12.5 in the spreadsheet, this will be rounded and imported as 13.