V12.0.12 / 14.0.7 / 16.0.3 Changes
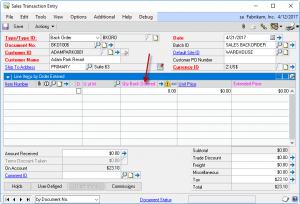
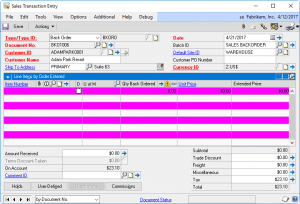
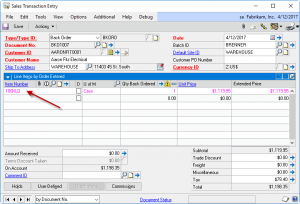
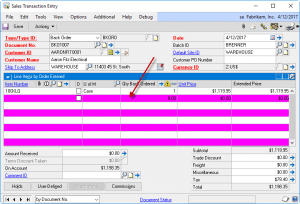
* Addressed issue that caused ‘non-boolean type expression’ error when selecting the Item Number in DR Entry for a Sales Order (#20176610)
* Updated WW Internal Resources
Author: admin
MFG PowerPack Release 2017-11-03
V12.0.124 / 14.0.71 / 16.0.37
* Vendor Pricing Maintenace & Inquiry: addressed issue with Notes button that caused it to save to the Vendor Note rather than the Item Note (#20176554)
* Lead Time Inquiry: addressed ‘duplicate key’ error caused by having the same component multiple times on the same level of the BOM (#20176585)
SpellCheck Release 2017-11-02
V12.0.20 / 14.0.11 / 16.0.8 Changes
* Addressed ‘table open’ error when switching companies
* Performance improvement with MS Word-based spellchecking. SpellCheck now keeps an instance of MS Word open in the background, rather than re-launching Word each time spellchecking is needed.
MOGenerator Release 2017-11-01
V12.0.76 / 14.0.51 / 16.0.29
* Extern_CreateMO2 and Extern_CreateMO4: changed the scheduling procedure for these two integration functions so that it always checks for Down Days, using the first WC, and always moves the MO to an earlier Start Date.
MFG PowerPack Release 2017-10-31
V12.0.123 / 14.0.70 / 16.0.36
* SVC Equipment Customer Change: previously this utility followed SVC logic of not allowing the change if the Equipment was on a Contract. It now will allow changing the Customer if the Equipment is on a canceled contract line.
* TWK: Edit MO Status Options- addressed illegal address error on ‘Process Index’ caused by closing the Edit MO Status window then clicking Update Description on the EMOS Options window (#20176408)
* Updated WW Internal Resources
CompleteCount Release 2017-10-19
V12.0.26 / 14.0.16 / 16.0.9
(1) Updated WW Internal Resources. Product will now alert SA/DYNSA when it is not registered.
MFG PowerPack Release 2017-10-18
V12.0.122 / 14.0.69 / 16.0.35
* Vendor Pricing Import: changed import routine when Multi-currency is enabled so it either uses the Currency ID assigned to the Vendor, or if no currency is assigned to the vendor it uses the Functional Currency ID
* Updated WW Internal Resources
MOGenerator Release 2017-10-18
V12.0.75 / 14.0.50 / 16.0.28
* Extern_CreateMO2 and Extern_CreateMO4: addressed issue in these two external integration functions that prevented creating a MOP-SOP Link. The issue was introduced in builds (11.0.47/12.0.43/14.0.18 20-JAN-16).
* Updated WW Internal Resources
WilloWare Community
One of our core objectives has always been to listen to you. Sometimes we receive your suggestions through an email or a support case, or on a phone call. We also monitor blogs and Microsoft’s Connect site.
We keep our ears open for things you would like our products to do, or do differently, and also for general Dynamics GP Wish List type items.
To a large extent, GP PowerPack and MFG PowerPack are the result of collecting your requests and turning them into software.
Our database of ideas has always been internal, which makes it difficult to assess how important any given request is. We just moved it to an external site where you can directly contribute your own Wish List items, read requests from other users, and vote on the ideas. Most of the “feature requests” we were tracking internally are now visible on the site.
Please join the WilloWare Community site. Feel free to share the link and invite others to join. We will use your suggestions to improve our products, and add new features.
If you have the Suite License for GP PowerPack or MFG PowerPack, you have access to everything that is in the Suite, as well as any new modules we add to the Suite. We have always sought to regularly add new features to both of these Suites, and now the WilloWare Community has the opportunity to directly influence what gets added next!
LeanMFG Release 2017-10-09
V12.0.29 / 14.0.18 / 16.0.8
(1) Item Engineering: fixed issue that prevent scrolling buttons from moving through records, fixed typo in text on window
(2) Updated WW Internal Resources
GP PowerPack Release 2017-10-09
V12.0.115 / 14.0.58 /16.0.26
* NEW System Tweak: Password Expiration Alert-provides an alert to users x-days ahead of when the password will expire.
* Alert Builder: made Product ID field editable
* Alerts: Addressed issue that occurred when switching users that resulted in the warning “Your attempt to log out of Microsoft Dynamics GP failed because one or more tables are open.” #20176339
MORI WIP Transfers
We just released (3-OCT-2017) a new build of MOGenerator’s MO Receipt Integration (MORI) that now has support for WIP Inventory. This new functionality provides the ability to record usage of raw materials as it happens. There are two components of the new functionality: (1) adjusting Picklists for WIP transfers, and (2) forcing consumption of components from the WIP Site.
WIP Transfers
The process is tailored for an external application integrating into GP, such as a Warehouse Management package, or Shop Floor Control software. We designed this approach in consultation with Without Wire Inventory Sciences.
After creating a Manufacturing Order in GP, the external software retrieves the Picklist from GP and uses it to create one or more Inventory Transfers to move inventory from stock to WIP.
The Inventory Transfer is a “picking transaction” for a Manufacturing Order. The external software tells MORI about the transfer by adding a record to the MOIVTrx table.
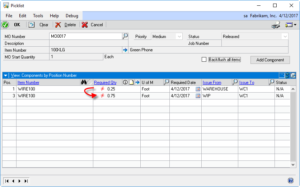
When the MORI processor runs, the first step is now to check the MOIVTrx table for new transfers. As shown above, there are two transfers for MO0017.
It processes transfers IN to the WIP Site first, then transfers OUT of WIP. The items transferred are matched to lines on the MO’s Picklist.
When inventory is transferred into WIP, the original Picklist line is decreased by the transfer quantity. A new Picklist line is added for the same item where the Issue From Site is the WIP Site. An example is shown above.
In the example, 0.75 FEET of WIRE100 have been transferred into WIP from WAREHOUSE. The original Picklist line with Issue From of WAREHOUSE, was decreased from 1.00 to 0.25, and a new Picklist line was added for 0.75 with an Issue From of WIP.
The original line will draw down until it reaches zero, but the WIP line will increase to show the entire quantity transferred into WIP. Likewise, if a transfer is posted OUT of WIP back into WAREHOUSE, the WIP line will be decreased until it reaches zero, and the original line will be increased until it reaches the original quantity.
There are several effects to note about this process.
First, inventory used by manufacturing can be put into WIP at the moment it is picked, and the MO does not need to be Released. This ensures the GP inventory quantities are current and accurate.
Second, by automatically adjusting the Picklist to reflect the transfer, Materials Requirements Planning (MRP) can detect the change in demand (i.e. decreasing need for WIRE100), and still see remaining demand.
Third, the Picklist becomes a live record providing a quick reference to inventory issued to an MO, and the inventory still required.
Lastly, by moving it into a WIP Site, rather than adjusting it out and tracking the dollar value, it is possible to perform a physical inventory on WIP.
WIP Consumption
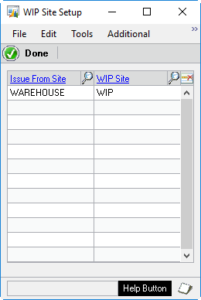
Setup in MOGenerator creates a relationship between a main inventory site and a WIP Site. This is shown below:
When an MO Receipt is processed, MORI creates a “split-MO” off the parent, which it runs through as a QuickMO. When MORI builds the Picklist it forces the Issue From Site to be the WIP Site.
As shown above, if the original MO has a Draw Inventory From of WAREHOUSE, MORI will force the components to be consumed out of WIP.
The MOPick table can still be used to direct MORI to consume specific quantities of specific materials.
MOGenerator Release 2017-10-03
V12.0.74 / 14.0.49 / 16.0.27
* MORI: (1) Added support for WIP Site & WIP transfers. (2) Added check for duplicate SN when Ser/Lot is provided in MOHdr rather than MOSer table. (3) Added routine to process split MOs first so that as soon as a partial receipt creates a split (i.e. MO00123-001), it is immediately processed.(4) MOHdrOpt BINNMBR now defaults to the MO Receipt Bin specified on the Item-Site for the Made Item in the Post To Site, and if that is not populated, it uses the Site Default Bins
* Updated WW Internal Resources
Dynamics GP HEAP Tables
You may have looked into a GP performance issue and dug around a bit and discovered that you have high fragmentation in a large number of table indexes. After rebuilding indexes, a large number of indexes still have high fragmentation, and they all have an Index Type of HEAP. What is this and why does GP have messy HEAP tables?
First, let’s start by looking at your index fragmentation, and talking about indexes.
SELECT OBJECT_NAME(ind.OBJECT_ID) AS TableName,
ind.name AS IndexName, indexstats.index_type_desc AS IndexType,
indexstats.avg_fragmentation_in_percent
FROM sys.dm_db_index_physical_stats(DB_ID(), NULL, NULL, NULL, NULL) indexstats
INNER JOIN sys.indexes ind
ON ind.object_id = indexstats.object_id
AND ind.index_id = indexstats.index_id
WHERE indexstats.avg_fragmentation_in_percent > 30
ORDER BY indexstats.avg_fragmentation_in_percent DESC
Run the query above against your company database. Note the “avg_fragmentation_in_percent > 30” line. This restricts the query to only show results if the fragmentation is above 30%.
The link above is to an XLSX of IV00101 (the Item Master) which I’ll reference below. There are several tabs along the bottom of the workbook:
IV00101 shows the complete table, with the data as it could be arranged physically on the hard-drive. Note that it is not in order by Item Number. When the Primary Key is “non-clustered”, data is simply added to the table using the next empty row at the bottom of the SQL table. Think of “SQL Table” as a single Excel worksheet.
For IV00101 the Primary Key (Primary Index) is ITEMNMBR (Item Number). An Index on a table is like an additional tab in an excel workbook. For the Primary Key of ITEMNMBR, SQL creates a page of data that contains only ITEMNMBR, and the data on that page is ordered by ITEMNMBR. Click on the PrimaryKey tab in the workbook.
A Non-Clustered index is a HEAP. The data is physically recorded on the disk in the order it was added to the table, in other words, it’s sort of a “heap” of data with no organization.
When a new record is added to IV00101, it is added to the bottom of the IV00101 page. SQL then inserts it into the correct position in the ordered list of the PrimaryKey tab.
The Key2, Key3 and Key4 tabs are the actual Alternate Keys (Indexes) on IV00101. Key2 is ITEMDESC (Item Description) and ITEMNMBR (Item Number). The data on that page is ordered by ITEMDESC then ITEMNMBR.
Likewise for Key3, the data is ordered by ITMCLSCD (Item Class Code) and ITEMNMBR (Item Number).
Each time you add a record to the IV00101 table, SQL also adds records to the page for each Index.
Now imagine that the index page is actually written on a yellow notepad. If you hit the end of the page you need a new page, and you need to place the paper on an open space on your desk. Now your index is fragmented. SQL Database Maintenance can reorder the indexes so that the data pages are next to each other rather than scattered around your desk.
If you were able to run the query above on your own database, the %-Fragmentation is a measure of how scattered your yellow notepad pages are on your desk. If it’s above 90%, that index is on a bunch of separate pages all over your desk.
I’m simplifying a lot. If you want a more technical description of index and fragmentation, click here.
So, why does GP have HEAP tables? Wouldn’t it make more sense to arrange the data on the disk in order by the Primary Key?
Because it mostly doesn’t matter, and probably not.
A clustered index (aka not a HEAP) arranges the data on the drive in the physical order dictated by the Primary Key. To write a new record it needs to rearrange the data on the page so it can insert the new Item Number into the correct row in the table. This is time consuming. So there is an argument in favor of HEAPs–they offer better performance writing data to the disk.
The HEAP doesn’t make any difference for most tasks. If GP needs a list of Items between A and D, it can use the Primary Key page, which is in the correct order.
Ultimately the real performance question is: Does the table have Indexes that provide (1) the columns needed by a GP function, and (2) in the correct order? For example, if I want a list of all Items in Item Class ATT CORD, SQL Server can use Key3. If that key didn’t exist, SQL would either have to read through the table by the PrimaryKey, pulling out the needed records, or simply read from the disorganized physical table. Either way is not efficient.
For a much more technical discussion of HEAPS, click here.
SQL Server has several tools to help you optimize database performance. In particular, the Database Engine Tuning Advisor can suggest additional table indexes to help performance based on your usage. Read more here.
The Anti-Spec
If you feel too constrained by the standard software spec, which describes only the functionality that will be present in the proposed software, we are proud to now offer our exclusive Anti-Specification Service. Our ASS will identify everything that will NOT be in the software—the features, functionality, and performance characteristics that will not be included. By employing proprietary Broadly Intelligent Guesswork, we are able to anticipate everything you might have wanted, and document its absence in the BIG-ASS spec.
The scope of these projects is nearly unlimited, except for the small amount of time required to refrain from documenting what the software will actually do. The deliverable is one BIG-ASS document.
As the great Sherlock Holmes said, “When you have excluded the impossible, whatever remains, however improbable, must be the truth.”
In this manner, by enumerating all the unlikely possibilities that we intend to exclude during the software construction process, when you closely examine our BIG-ASS spec, you will find the only thing missing is your custom code. If you would like to engage us for a BIG-ASS project, we are offering a special discount to first-time clients in an even percentage amount greater than 14% and less than 16%.
MFG PowerPack Release 2017-09-29
V12.0.121 / 14.0.68 / 16.0.34
* MOSplit: added a check during MOP Receipt posting to remove from IS01001 any invalid records associated with the SOP Line linked to the MO being received (#20176257)
MFG PowerPack Release 2017-09-27
V12.0.120 / 14.0.67 / 16.0.33
* Vendor Pricing: (1) added PowerATP integration, (2) addressed issue with the Import utility where it incorrectly identified errors in decimal quantities.
* BOM Archive: addressed issue where the archive picked-up incorrect components when notes were attached to the BOM Component Line.
* PowerATP: (1) added option to use Order Point Qty rather than Safety Stock (#20175873), (2) Create PO utility now uses Vendor Pricing.
* Updated WW Internal Resources
MFG PowerPack Release 2017-09-05
V12.0.119 / 14.0.66 / 16.0.32
* Ser/Lot Pre-Assign: now also checks for and auto-generates ser/lot numbers when MO Status is changed.
* NEW TWEAK – Unlink MO from SOP: unlinks a single MO from a selected line, or all MOs from the selected document via an Additional Menu on Sales Transaction Entry.
GP PowerPack Release 2017-09-07
V12.0.114 / 14.0.57 /16.0.25 Changes 7-SEP-2017
* Login Monitor: (1) addressed issue with table key that prevent “During Login” from removing all inactive users, (2) changes in the 7-OCT-16 build to reduce load on server by disabling LogMon for “excluded” users also caused those users to not appear in the LogMon Inquiry window. Excluded users are again displayed in the Inquiry window, but since their activity is no longer tracked, tracking numbers will be zeros.
LabelLink Release 2017-09-13
V12.0.35 / 14.0.18 / 16.0.7
(1) SOP Order Fulfillment: added Additional menu to access LabelLink from this window
(2) Updated WW Internal Resources
GP PowerPack Release 2017-08-24
V12.0.113 / 14.0.56 /16.0.24
(1) Mass Batch Change: added additional selection criteria fields from the SOP Header table
(2) SOP Tweak-Customer PO Required: added check that SOP Entry is still open (#20173792)
(3) AP Templates: discontinued
MFG PowerPack Release 2017-08-17
V12.0.118 / 14.0.65 / 16.0.31
* Capable to Promise: (1) addressed sql error in Sales Unmet Demand calc, (2) Added Cancel button to stop long running SmartList item import, (3) Addressed issue that caused imported items to not display in the scrolling window, (4) If SmartList does not have a quantity column, the import now defaults to 1.
* Lead Time Inquiry: (1) addressed sql error in Sales Unmet Demand calc
* Tweak-Default Primary Routing: (1) addressed warning “No previous sequences exist” when zooming to routing from Std Cost Changes window.
SpellCheck Release 2017-08-04
V12.0.19 / 14.0.10 / 16.0.7
(1) SpellCheck now uses MS Word for desktop spelling (if MS Word is installed), and it switches to Bing SpellCheck API for the Web-client, or when Word is not installed.
(2) Addressed issue with Bing API Company Dictionary that prevented it from correctly detecting when words were in the Company Dictionary
MFG PowerPack Release 2017-08-04
V12.0.117 / 14.0.64 / 16.0.30
* Capable to Promise: (1) added Backorders to Sales Unmet Demand calc, (2) addressed issue in Sales Unmet Demand calc that caused it to not calculate Qty in Base
* Lead Time Inquiry: (1) Added sorting options, now defaults to sort by longest lead time first, (2) Added option to include sources of Unmet Demand from MFG Picklists, Sales, and Service.
* BOM Archive: addressed issue that caused it to loop thorough all BOMs for an Item
* Vendor Pricing: (1) Addressed issue that prevented correctly rolling a pending price list into the current price list, (2) Added controls to VP Maintenance to prevent viewing Historical price lists
MFG PowerPack Release 2017-07-31
V12.0.116 / 14.0.63 / 16.0.29
* Vendor Pricing: (1) addressed issue that caused cost to only use 2-currency decimals when Multi-Currency was disabled, (2) added Additional Menu on Item Vendors window to access Vendor Pricing Maintenance, (3) added GoTo on Vendor Pricing Inquiry to access Vendor Pricing Maintenance
MFG PowerPack Release 2017-07-20
V12.0.115 / 14.0.62 / 16.0.28
* PowerATP: Changed routine that retrieves SOP requirements so it uses In House Due Date (IS010001.SOITEMDUEDATE_I) when MFG is installed, and the SOP Line Requested Ship Date when MFG is not installed.
* TimeCard: (1) Addressed issue that prevented Machine ID from saving, (2) Transaction Number now displays after selecting the Routing Sequence rather than being generated at the moment the Time Entry is saved, (3) Added a Delete button on Time Card Entry, and a new Setup option to control whether the button is visible or not (defaults to not visible)
* SmartParts: (1) Fixed position of Help Button so it does not slide off screen after selecting a Mask ID, (2) Added trim spaces off front/end of Description
* SVC Equipment Suite: addressed issue building configurations during SOP Posting that resulted in a ‘cannot insert null’ error on SLRWEND (Seller Warranty End Date) when no Seller Warranty Code was present (#20174885)
MO Generator Release 2017-07-24
V12.0.73 / 14.0.48 / 16.0.26
* MORI: added routine to auto-create/update fields in MOHdrOpt if receiving an existing MO (integrations are no longer required to populate this table if receiving against existing MOs)
GP PowerPack Release 2017-07-13
V12.0.112 / 14.0.55 /16.0.23
(1) Bin-to-Bin Transfer: added additional error checking to trap an unknown event that caused an bin-to-bin transfer to post with QTYTYPE = 6 (#20173853)
MFG Data Archive Release 2017-07-17
V12.0.23 / 14.0.14 / 16.0.9
(1) MFGDA now keeps a record in the live company of the document numbers moved to the archive database, and uses that record to prevent re-use of document numbers. Users are no longer required to have read permissions (or any access to) the archive database. The tracking table will be updated automatically from the existing archive, if one exists.
SpellCheck Release 2017-07-06
V12.0.18 / 14.0.9 / 16.0.6 Changes
(1) Updated WW Internal Resources. SpellCheck can now be used without registration keys in <TEST> companies.
MO Generator Release 2017-07-06
V12.0.72 / 14.0.47 / 16.0.25
* Updated WW Internal Resources. MOGen can now be run without registration keys in <TEST> companies.
MFG Data Archive Release 2017-07-06
V12.0.22 / 14.0.13 / 16.0.8
(1) Updated WW Internal Resources. MFG Data Archive can now be run without registration keys in <TEST> companies.
GP PowerPack Release 2017-07-05
V12.0.111 / 14.0.54 /16.0.22 Changes
(1) Select Checks Filters: addressed issue that caused a ‘date/time conversion’ error when using a Receivings User Defined Date field in the selection query (#20173804)
MFG PowerPack Release 2017-07-03
V12.0.114 / 14.0.61 / 16.0.27
* Updated WW Internal Resources
LeanMFG Release 2017-06-30
V12.0.28 / 14.0.17 / 16.0.7 Changes
(1) Updated WW Internal Resources.
Item Process Tracking Release 2017-06-30
V12.0.34 / 14.0.17 / 16.0.6 Changes
(1) Updated WW Internal Resources. LabelLink can now be used without registration keys in <TEST> companies.
(2) POP Receiving Entry: LabelLink now auto-saves/reloads the document so the Receipt Header information is saved to table before printing
BlanketPO Release 2017-06-30
V12.0.32 / 14.0.21 / 16.0.7 Changes
* Updated WW Internal Resources. BlanketPO can now be used withour registration keys in <TEST> companies.
* Addressed ‘illegal address’ error caused by closing the PO Release Entry window while the treeview is filling (#20173626)
* Release Entry: Added delete row button to Planned Releases scroll
Item Process Tracking Release 2017-06-29
V12.0.11 / 14.0.6 / 16.0.2 Changes
(1) Updated WW Internal Resources. IPT can now be used without registration keys in all <TEST> companies.
(2) IPT can now be used without Manufacturing or Field Service.
GP PowerPack Release 2017-06-29
V12.0.110 / 14.0.53 /16.0.21 Changes
(1) Bin-to-Bin Xfer: (a) addressed registration issue that caused the Bin-to-Bin Transfer Inquiry window to be active when multi-bin was not enabled, (b) addressed issued that caused the Bin-to-Bin Inquiry window to open for non-Bin-to-Bin transactions.
(2) Updated WW Internal Resources
EZImport Release 2017-06-29
V12.0.11 / 14.0.4 / 16.0.2 Changes
(1) Updated WW Internal Resources. EZImport can now be used without registration keys in <TEST> company databases
Engineer to Order Release 2017-06-28
V12.0.28 / 14.0.11 / 16.0.4 Changes
(1) Added Routing Name to BOM Header (W6992BOMHeader). Table will be updated automatically during the installation routine. This change allows user to specify a Routing Name. Previously the MFG Routing Name was created from the ME BOMID.
(2) Addressed ‘illegal address’ error in AddChildren caused by closing window while it was filling (#20170700)
(3) Addressed ‘illegal address’ error caused by closing ME window while the UpgradeNotes routine is running (#20167976)
Consulting Toolkit Release 2017-06-28
V12.0.17 / 14.0.11 / 16.0.7 Changes
(1) Updated WW Internal Resources. CTK can now be used without registration keys in <TEST> companies.
CompleteCount Release 2017-06-28
V12.0.25 / 14.0.15 / 16.0.8 Changes
(1) Updated WW Internal Resources. CompleteCount can now be used without registration keys in <TEST> companies.
BOMImport Release 2017-06-27
V12.0.36 / 14.0.19 / 16.0.7 Changes
* Updated WW Internal Resources. BOMImport will now run without registration keys in <TEST> companies
Preactor Integration Release 2017-06-27
V12.0.14 / 14.0.10 / 16.0.8 Changes
* Updated WW Internal Resources. API will now work without reg keys in <TEST> Companies.
GP PowerPack Release 2017-06-27
V12.0.109 / 14.0.52 /16.0.20
(1) Updated WW Internal Resources to address ‘illegal syntax’ error during log-in with Server-Name based registration key.
WilloWare in TEST
During July (2017) we will be rolling out new builds of all of our software. This mid-year update addresses any open, low-priority issue reports, and adds a few helpful system features. If you are receiving our “software release” updates, you will receive a couple of emails listing a large number of releases as this roll-out occurs.
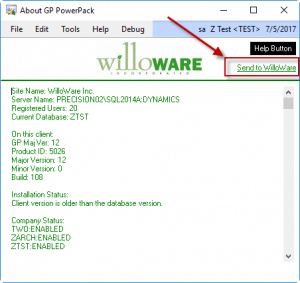
The first new system feature is that our Error Reporting window and About window can now create support case with WilloWare from inside GP.
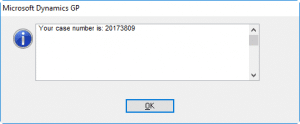
The information displayed in the window will be added to a Support Ticket, and you will be provided the Ticket ID, as shown below:
The second new feature is something we are excited about. All of our software will now be fully functional, without registration keys, in <TEST> companies. There are two benefits from this:
First, you can download and test our software using your live data without needing a temporary, time-limited key.
Second, if you already have our software but are not registered for all of its features, you will be able to test ALL functionality in the <TEST> company without changing your registration key.
In short, all functionality of all of our modules is always available in a <TEST> company.
In case you are not familiar with a <TEST> company, here’s a quick overview.
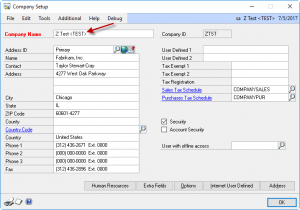
Dynamics GP has a little feature that is not well documented, which provides support for Test and Historical company databases. To enable this feature, put <TEST> or <HISTORICAL> at the end of the Company Name, as shown below:
The primary effect of this is that it Zeros the Employee Count so the Employees in a TEST or HISTORICAL Company do not affect payroll.
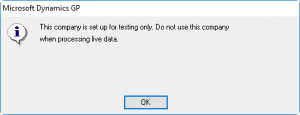
It also causes a warning to pop-up during login to help alert users that they are not in the live company:
And, with the new builds of all WilloWare software, it causes the software to enable full functionality.
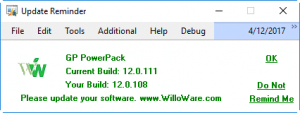
Lastly, our software can now automatically check to see if there are updates. The check is done when “SA” logs-in to GP. If there is a new build available you will see a window like this:
If you click the Do Not Remind Me link, it will turn off further notifications until a new build is installed. When a new build is installed it re-enables the Update Reminder.
Fun With Color Settings
Color Settings (in GP PowerPack), is (a) Awesome and (b) Free! It provides the ability to for users to edit their own settings, and for admins to apply a company-wide setting. With access to 26 user-interface elements, and 17 colors, Color Settings can create a whopping 5900 different colorful combinations.
Since only SA has access to the system-wide settings, end-users can play around with their personal Color Settings to create a GP look that makes them happy. Below is a quick highlight of each color setting.
Button And Label Text
Control Bar 3D Button Background
Control Bar 3D Button Hover Bottom
Control Bar 3D Button Hover Middle
Control Bar 3D Button Hover Top
Control Bar 3D Button Top/Middle/Bottom (Red/White/Blue)
Control Bar 3D Button Selected Bottom
Control Bar 3D Button Selected Middle
Control Bar 3D Button Selected Top
Control Bar 3D Button Selected Top/Middle/Bottom (Pink/Yellow/Green)
Control Bar Background Bottom
Control Bar Background Top
Control Bar Background Top/Bottom (Green/Yellow)
Disabled Button Highlights
Disabled Field Text
Drop Menu Background
Drop Menu Text
Editable Field Background
Field Text
Locked Field Label And Field Text
Scroll Window Column Headers
Scroll Window Column Header Text
Scroll Window Line One Background
Scroll Window Line One Text
Scroll Window Line Two Background
Scroll Window Line Two Text
Scroll Window Both Lines
Window Background
LeanMFG Release 2017-06-13
V12.0.27 / 14.0.16 / 16.0.6 Changes
(1) Updated WW Internal Resources. Product will now be fully functional in <TEST> company databases.
(2) Item Maintenance DELETE: added control on the Delete button to check for use of the Item in BOMs. User is warned and given option to view Item in the Where Used Inquiry window.
MFG PowerPack Release 2017-06-26
V12.0.113 / 14.0.60 / 16.0.26
* Vendor Pricing: added Import utility to bring Vendor Pricing in from an Excel spreadsheet.
* Setup window: changed how it reads setup to reduce requests to the database.

